Statement of Intent

This is Old Fools outlet for kilts and other unbifurcated garments for men or women. It is not for furthering cross dressing or costuming. It is for the furthering of alternate apparel for men and sometimes will discuss bifurcated (trousers, pants, etc.) garments as well. Since women can and do wear anything they want little will be said about womens clothing. That is not to say that nothing will be said about them. If men want to dress and look like a woman that is fine with me and some do it very well. Here, however, the intent is about men that want alternate mens clothing. The Old Fool (me) is not an expert in this field but he sews, has made several kilts, modified store bought kilts and wears them. I also wear sarongs, pareu, lava lava and anything else that is comfortable and practical. Some of my kilts might be called skirts but I am comfortable with that.

Visit the Old Fools blog

So I said to the boys "hello girls".
"We're not girls" they replied.
I said "you're dressed like girls".
They immediately pointed out that I was the one wearing a skirt. I had on a kilt.
I then asked "when was the last time you saw a female in anything but pants?"
Silence.

Wednesday, September 21, 2011

Old Fools Kilts: Sewing Is Winter Work or excuses for having all this fabric laying around.

Sewing is just not summer work for me. It should be because I'm stuck inside quite often because of rain, heat and humidity but I can't seem to get enthusiastic about sewing until it is cold.

I have several projects in queue but in no special order. The picture at the top is an ancient Egyptian kafkan and I have a vertically striped piece of fabric that I'm going to try to make it out of.  I think however that I will use a basic Roman tunic pattern since they come out about the same. It will be near ankle length since it is for winter time sitting on my butt at the computer.  It will probably look more Moracan than Egyptian.  I used a floor length plaid flannel night gown and alternately a huge 5x T shirt for that purpose last year (not at the same time)  and it worked quite well.

<--Sort of like this only a little longer.

I acquired two pieces of 11 ounce wool in light grey this summer for a ridiculously low price ($1.50 usd) that when pieced together will make a nice knock around casual kilt providing I don't find anymore moth bites out of it.  I'm going to try slash pockets as well.

The leftovers from the last wool kilt are enough for another but I'm holding off until I lose more inches in my waist and ass. At the rate I'm going that may be after I'm dead.

The leftovers from my polyester everyday very light weight work kilt are more than enough to make another. I made the one I have in a reverse kingussie (all pleats point to the center of the back) and I have lost enough weight to have to modify it slightly. The problem with the kingussie is that to make it smaller it has to be done on both sides in order to keep the apron centered in front and the center pleat centered in back. All kilts for my personal use will be left to right knife pleats from now on.  Easier to make and easier to modify. The added bonus is my prehensile butt cheeks don't seem to grab at the fabric so much when I stand up. An experiment in large removable cargo pockets is on the agenda.

Right now I'm trying to get a few plants in for Autumn and gathering firewood for this winter.

I find myself quite often these days just gazing into the distance.

Later.

Thursday, July 7, 2011

Old Fools Kilts: Only Wool Kilt so far

 I found this nearly four yards of 13 ounce wool tweed at the thrift store for pocket change. It was less than a dollar a yard and there is enough for two kilts if I am careful.  I'm not a very big guy so it doesn't take much for me.
My cutting table

On to the cutting board it went.  Sounds easy so far.  It took me the better part of two days to decide where to cut and how much.  Then it took about 15 minutes to cut it.  After cutting I had to rest before starting this pleating. I was so psychologically exhausted just from making a decision.  I just knew I would do something wrong but I didn't. What a wuss.
I love this iron on interfacing.  It is so much easier because it stays in place while running through the sewing machine. This is just before sewing on the waist band itself. The sewing went well with out swearing. I celebrated by swearing.

Front apron closed.
Front apron open. Pocket is visible and secured
Pocket open.  By opening the side of the pocket this way I was able to have a smooth apron when it is closed and still be able to access the pocket without looking too goofy.  Even with this it looks like you are groping your crotch when you go for your wallet.

The pocket is deep and wide to keep it from being bulky.


This is my favorite kilt.  It is comfortable summer and winter. It feels good against the skin. I goes with about any color and it fits perfect.  I expect it will be with me until I go to the cutting table at the University.

Sunday, June 26, 2011

Old Fools Kilts: Kilted After Bath Towel

I have been using towels as lounging sarongs for as so long I can't remember when it started. Near as I can tell it started when I really started spending a lot of time on a boat of my own.  When we were in Baja Sur I even attended a yachty get together in one wrapped as a pareu and wearing a top hat. That particular one was acquired in the mid 1960's in my hippy days and I finally wore it out after about 30 years. They just don't make anything to last. (Sarong and Pareu are essentially the same just different names from different localities.)

This after bath towel was made from two heavy large bath towel that were on sale at the Dollar General. I bought them for the color and they are too heavy for this application but they are what I had at the time. I intend to do it again someday but I will use really light terry cloth next time.

This side view shows how shallow the pleats are. Unlike a real kilt I wanted as little overlap of material as possible so the pleats were made shallow and wide. No effort was made to iron in creases.
A pocket of course. Every boy needs a pocket for his pocket knife, rocks, frogs and whatever else he may find. It was on the other side but since this towel is held together with Velcro and I carry a camera and tools sometimes it would literally fall off.  By moving the pocket to the opposite side away from the fastening I hope I have corrected that.
Utilikilts
Front view. You can see the outline of where the pocket used to be.
I made no effort to make this into anything but a  comfortable kilt like towel wrap.

It is extremely comfortable winter and summer although in the summer it is a little heavy. I have a couple of after bath towel wraps that are without the pleats and lighter weight that are worn like a pareu with Velcro closings but because of the pleats this is more comfortable.  It feels like nothing is covering your butt at all. Every time I put it on I think of what someone said about Utilikilt "It's like being naked with pockets".

Friday, May 13, 2011

Old Fools Kilts: Ironing pleats

If the world were a logical place, men would ride side saddle. 
 ~Rita Mae Brown

Ironing is so out of style these days that when I bring it up I am sometimes treated as if I have suddenly sprouted another head.  Eyes glaze over, especially the females, and men snicker. Children have no idea what I am talking about.  I happen to like to do it. It is a mindless thing that accomplishes something while my mind is free to wander about on it's own.

The picture above is of a wool kilt that I made and it does not need ironing often but I had just moved a Velcro closure strip because my waist has gone down two inches since I made it.  I'll tell about this kilt in another post.

I hadn't intended to do this job at this time but SWMBO (she who must be obeyed) had a pair of pants that needed hemming so I had the irons out anyway.  When I set up the sewing machine I automatically set up the ironing board. Having it handy makes sewing so much easier.

The reason for two irons is so I have a cold iron for drawing heat out of a pleat I have just steamed. That helps to set it.  The white steam iron on the right is very light and does a good job of steaming.  The iron on the kilt is twenty years old or more as it still has a cloth wrapped cord. I works fine but I bought it for it's weight (thrift store one dollar).  It weighs more than double the new iron.  For years I have looked for a cast iron type that is set on the stove to heat but every time I find one it is an antique and to costly for me. Mostly those end up as doorstops or bookends I think.

The technique I use is to set it on a pleat just ironed while ironing the next.  This iron will cover two pleats.  It may sound tedious but the results are worth it.

Tuesday, May 3, 2011

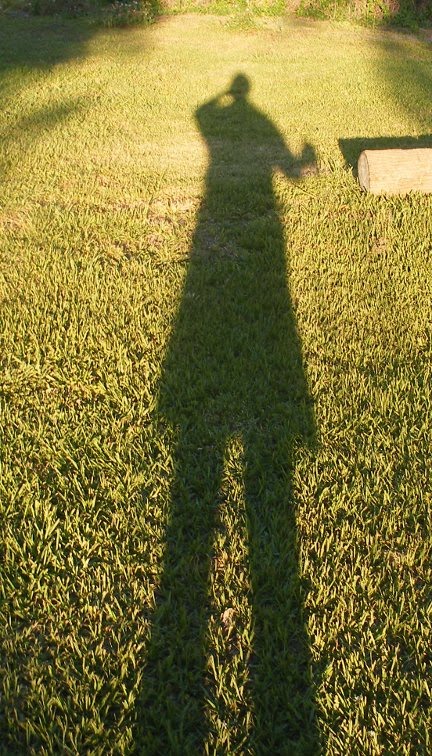
Old Fools Kilts: My Kilted Shadow

What is life? It is the flash of a firefly in the night. It is the breath of
a buffalo in the wintertime. It is the little shadow which runs across the
grassand loses itself in the sunset..
Blackfoot proverb


With wine glass in one hand and camera in the other I'm off to a sunny corner of the garden for sunset cocktails with my bride and the kittens.

Thursday, April 28, 2011

Old Fools Kilts: A Summer Kilt For the Garden and Shop

Is there anything worn under the kilt? No, it's all in perfect working order -Spike Milligan


This is another kilt construction that was driven by the fabric. I happened on
to this polyester fabric somewhere and I cannot for the life of me remember
where. My penny pinching gene however remembers that it was one dollar a yard.
I can't buy shop rags for that so I could not pass it up.

It is very light camo polyester. It is so light that if you hold it up to the
light you can see right through. That's just right since in a minimum kilt
there will be three layers in back and two in front. I am not the authority on
what is minimum but that is my minimum. I have figured out how to make a kilt
like garment that has less since making this one and still look like a kilt but
that will come later in a Kilted Towel Post.
Front
In the not so good photo above of the front you can see the apron is not full
width. It is about 1/3 my waist measurement.  Contemporary kilts seem to go for
something around that number some are more narrow but this is what I liked best. It makes the pleats show from the front and makes for less interference of the cargo pockets with the pleats.

In the photo below the reverse box pleat is in the center. All the pleats are sewn down three inches from the bottom of the waistband. The outer edge of each pleat is sewn in as well but not the inner edge. That was not necessary with this fabric but I was having so much fun with the machine I couldn't stop myself. (I have resisted buying a nail gun because of that sort of compulsive excess.) It does make it truly wash and wear. I can take it out of the dryer, shake it out and wear it.
Tail Feathers
I made this kilt before I started losing my waistline. I had lost weight but my waist measurement did not show it yet. Once you get a gut it is damned hard to get rid of. Now I have lost enough that it is on the verge of getting lopsided. Oh well I made it and I can adjust it and gladly.


This photo taken in September 2009 was taken in the garden mainly to show one of the walking sticks I made from the fallen gifts from the trees caused by hurricane Gustav. It does show the length just below the top of the knee cap and the cargo pocket on my right side.


Damned long-haired hippy freak

This is the kind of work that this light weight kilt was made for. If you look close you can see the left side cargo pocket. I was cutting tin for the roof of the generator lean too and it was hot out. Even as lightweight as this kilt is it's still plenty hot. I am working on a design that vents better. The ideal would be to take it off when it gets that hot but then there would be visits by the authorities protecting innocent eyes from that spectacle and the paperwork just wouldn't be worth it. I will admit to having done that inside the shop when it was 95 degrees squared (meaning the humidity equals the temperature). 
The camo pattern hardly shows blood.

Saturday, April 23, 2011

Old Fools Kilts: My First Serious Attempt At Sewing A Kinggussie Kilt

One American dollar per yard for 10 ounce acrylic .
What a deal. If it looks brown that is because it is.
Unlike the shirting flannel in my first DIY kilt attempt this full width fabic was long enough to make a kilt for me without piecing it together.  It takes less than 4 yards of material in overall length to make an acceptable kilt for me.  Since all kilts are layered garments it became apparent to me that I needed to choose the fabric wisely.  A traditional eight yard kilt would only be wearable at most three months of the year. Some years would never be cool enough.  Nice to have and they look great but impractical for SE Louisiana.  So I went about figuring out the minimum layers I could make one  with and still have all the good characteristics of a kilt.

What I finally boiled it down to was two layers in the front consisting of the inner and outer apron and pleated in the back with no pleat overlapping another.  That means that when hanging at rest there are three layers. but when the pleats are opened it is one layer.
I wanted a casual contemporary kilt and I thought I was being smart when I decided to make it a reverse kingussie which is pleated symmetrically from the front to center of the back. The pleats point back and end in the center with a reverse box pleat. Little did I know what a pain in the ass this would be. It has to be carefully planned so that the front apron and the center pleat in the back are centered.  You cannot just wrap it further around your waist as you lose weight because the centering will be off but since I built it I can unbuild it for modification when necessary.

Hidden pocket 
Making a kilt for me is relatively easy as I have perfect measurements 41-41-41. I still have to taper the waist smaller than the hips but not much. The photo above is of the nearly finished kilt showing the opened hidden pocket.  I would have used the selvedge for the hem but it was trashed in several areas. That may have been the reason for the one dollar a yard price.

Instead of the traditional full apron I made
 a one third apron. 


The cargo pockets blend in nicely.
I did not get the kilt centered


Left side


I have lost two inches in the waist and the kilt is starting to get a little lopsided when I wear it. It will soon be time for a make over.  When I do I will make the cargo pockets of equal size.  They were an experiment that became essential.  When they are loaded down the do tend to foul the pleats somewhat.

This is a very comfortable kilt and just feels right when I wear it which is often.  It is wash and wear so I'm not reluctant to wear it in the garden. Machine washable, dryer rugged and put it on.  I usually touch up the pleats with a steam iron but it is not necessary.

This belt was the original closure but it was such a pain that as a
buckle that I changed it to slipping through the buckle ring and
fasten with Velcro.  The under apron is fastened with Velcro.