 |
One American dollar per yard for 10 ounce acrylic .
What a deal. If it looks brown that is because it is. |
Unlike the shirting flannel in my first DIY kilt attempt this full width fabic was long enough to make a kilt for me without piecing it together. It takes less than 4 yards of material in overall length to make an acceptable kilt for me. Since all kilts are layered garments it became apparent to me that I needed to choose the fabric wisely. A traditional eight yard kilt would only be wearable at most three months of the year. Some years would never be cool enough. Nice to have and they look great but impractical for SE Louisiana. So I went about figuring out the minimum layers I could make one with and still have all the good characteristics of a kilt.
What I finally boiled it down to was two layers in the front consisting of the inner and outer apron and pleated in the back with no pleat overlapping another. That means that when hanging at rest there are three layers. but when the pleats are opened it is one layer.
I wanted a casual contemporary kilt and I thought I was being smart when I decided to make it a reverse kingussie which is pleated symmetrically from the front to center of the back. The pleats point back and end in the center with a reverse box pleat. Little did I know what a pain in the ass this would be. It has to be carefully planned so that the front apron and the center pleat in the back are centered. You cannot just wrap it further around your waist as you lose weight because the centering will be off but since I built it I can unbuild it for modification when necessary.
 |
| Hidden pocket |
Making a kilt for me is relatively easy as I have perfect measurements 41-41-41. I still have to taper the waist smaller than the hips but not much. The photo above is of the nearly finished kilt showing the opened hidden pocket. I would have used the selvedge for the hem but it was trashed in several areas. That may have been the reason for the one dollar a yard price.
 |
Instead of the traditional full apron I made
a one third apron. |
 |
| The cargo pockets blend in nicely. |
 |
| I did not get the kilt centered |
 |
| Left side |
I have lost two inches in the waist and the kilt is starting to get a little lopsided when I wear it. It will soon be time for a make over. When I do I will make the cargo pockets of equal size. They were an experiment that became essential. When they are loaded down the do tend to foul the pleats somewhat.
This is a very comfortable kilt and just feels right when I wear it which is often. It is wash and wear so I'm not reluctant to wear it in the garden. Machine washable, dryer rugged and put it on. I usually touch up the pleats with a steam iron but it is not necessary.
 |
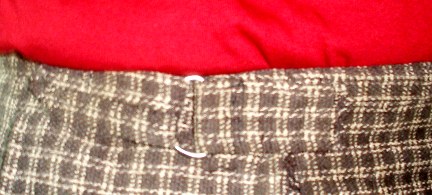
This belt was the original closure but it was such a pain that as a
buckle that I changed it to slipping through the buckle ring and
fasten with Velcro. The under apron is fastened with Velcro. |


No comments:
Post a Comment